
Getting started · Beginner-friendly
How to Add a Property in PropLog
Never used PropLog before? No problem. This guide shows you exactly what to click, one step at a time, with a picture for every step. Adding your first property takes about a minute.
Last updated 11 August 2026
Quick check before you start
Properties in PropLog belong to your agency, not to you as a person. So before adding a property, make sure one of these is true:
- Someone at your agency already invited you and you accepted — you're all set, or
- You signed up and created your own agency — takes under a minute, just a name and email.
Not sure? Look at the top-left of your screen after logging in. If you see your agency's name next to the PropLog logo, you're good to go — skip straight to Step 1 below.
Click "Properties", then "Add Property"
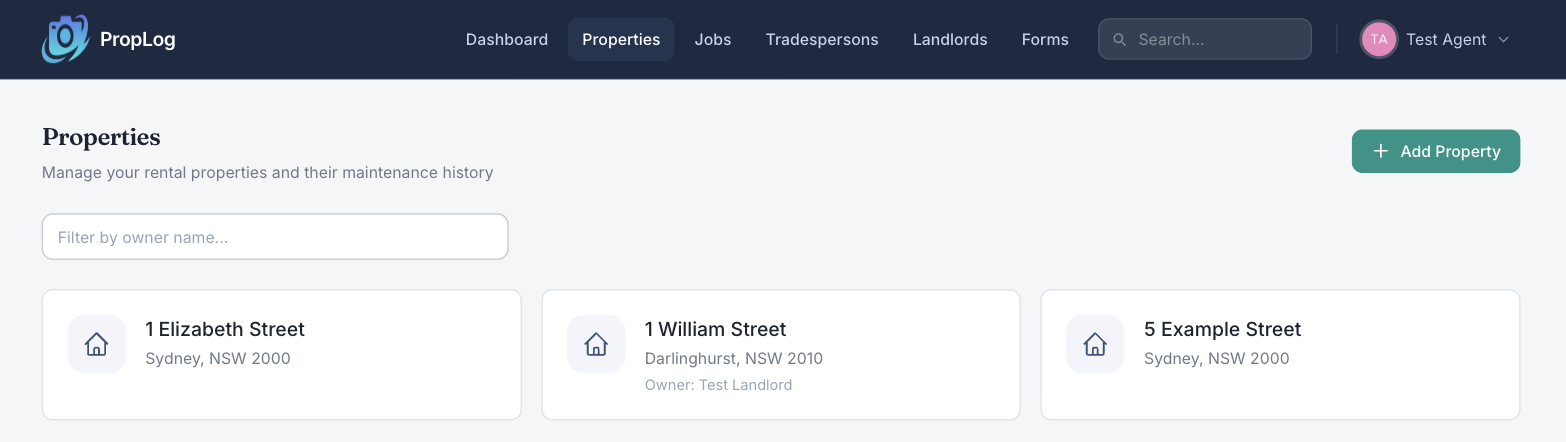
Look at the menu across the top of the screen. Click the word Properties. You'll see a list of any properties already added. In the top-right corner, click the green button that says + Add Property.
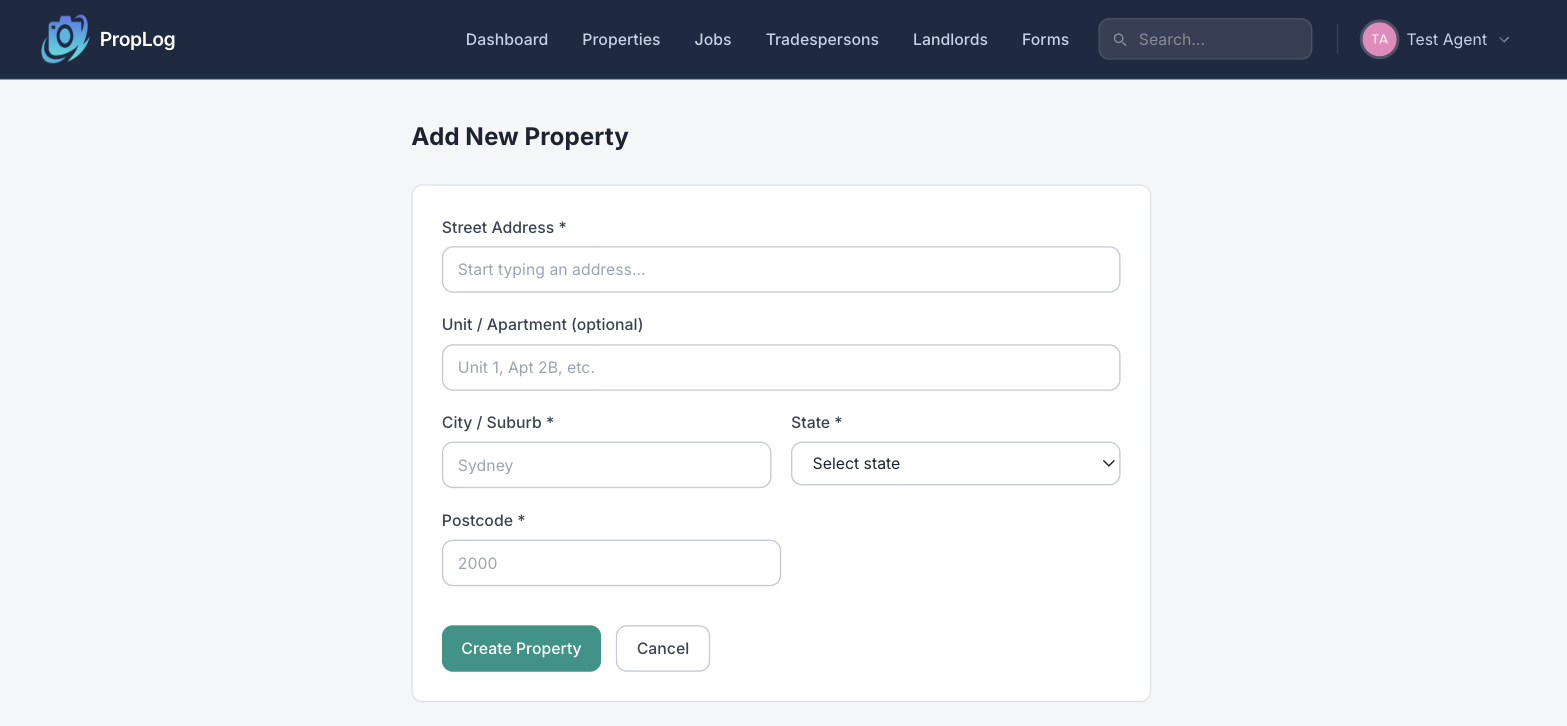
A form pops up. Here's what to type.
Don't worry — it's a short form. Here's what each box means, in plain English:
Street Address
Start typing the address. Pick it from the list that pops up underneath — that's the fastest way and it fills in the rest for you.
Unit / Apartment (only if it applies)
Renting out a unit or apartment? Type the unit number here, like "Unit 1". If it's a house, just skip this box.
City / Suburb, State, Postcode
These usually fill in by themselves once you pick the address above. Just give them a quick glance to make sure they look right.
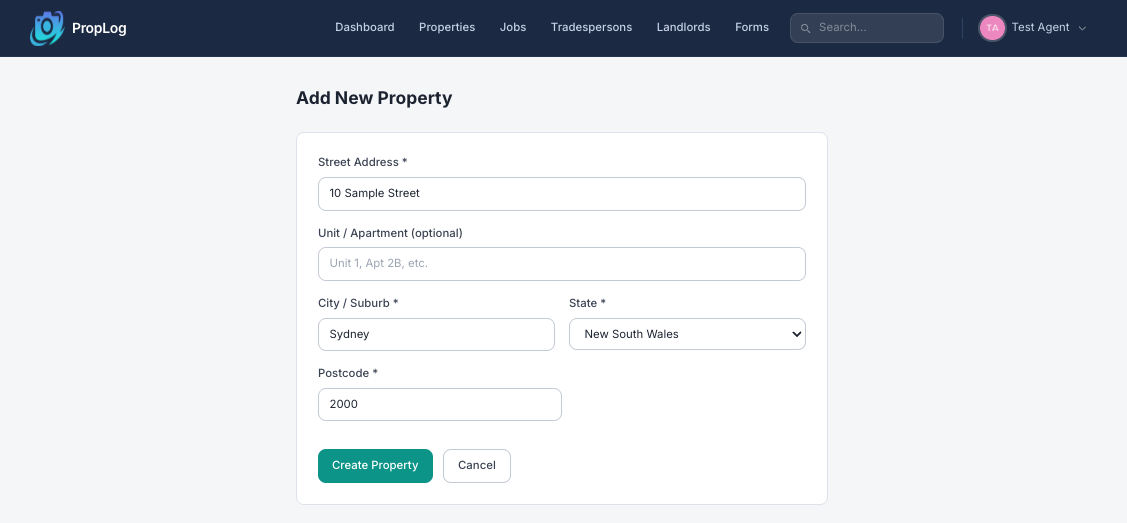
Give it a quick look, then click "Create Property"
Here's an example of the form all filled in. Yours will look just like this, but with your own address. Once it looks right, click the green Create Property button at the bottom.
That's it — you're done!
PropLog saves the property straight away and takes you to its own page. This page will keep every photo, repair, and update for this address, for as long as you use PropLog.
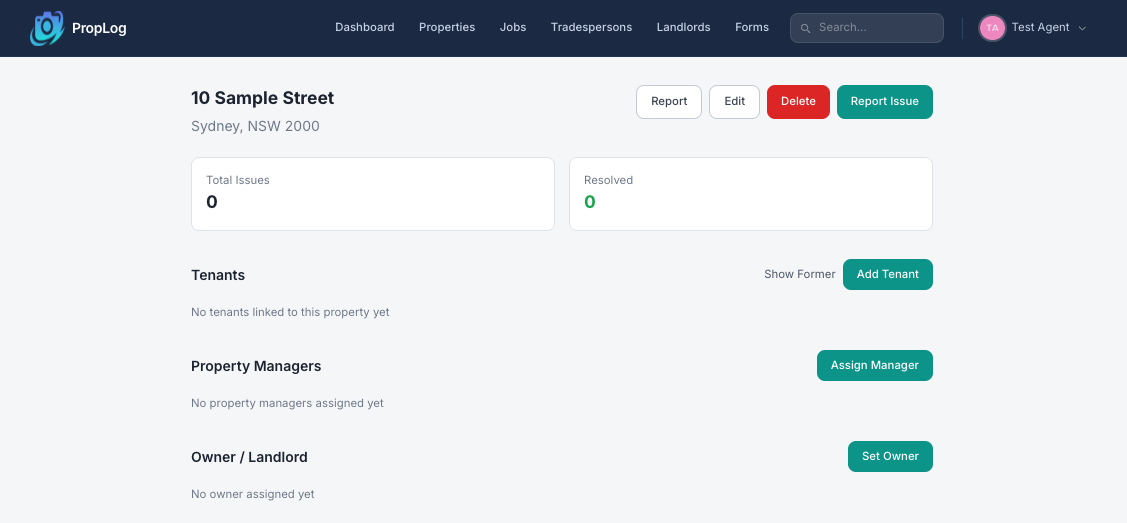
A few things you can do next:
- Add Tenant — so the people living there can report problems.
- Assign Manager — put a colleague in charge of this property.
- Set Owner — add the landlord so they can see how the property's being looked after.
- Report Issue — log a repair yourself, if a tenant called or emailed you instead of using PropLog.
You don't need to do any of these right away — the property is already saved and safe. Come back to them whenever you're ready.